THE TOP ROW

CONGRATULATIONS! After HOURS of trying to click the "Go Advanced" button in the tutorial you probably -finally- figured out it was part of the tutorial and managed to turn on WYSIWYG! YOU are awesome. You should take a moment to admire your awesomeness. Then get yourself ready for MORE TUTORIAL! WOO!
First things first. We may as well go through the buttons in order. Especially for the most important and maybe even YOUR worst enemy button. The "Remove Text Formatting" button:
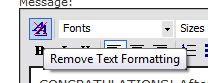
This button removes -all- formatting. So don't click it unless you absolutely want to. Or else you'll have to start all over. So keep it in, it's there, but your relationship with it will be love/hate. You love to use it sometimes, it hates to do what you actually want it to do when you accidentally click it.
Now to actually learn how WYSIWYG actually works! This is so cool, so brace yourself. See above where it says Fonts? Look below for help locating it:
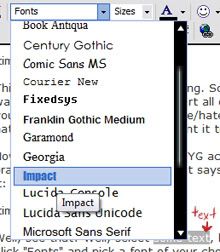
Well, see that? Well, select
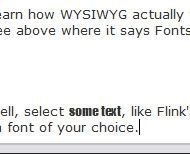
some text, like Flink's doing RIGHT now, then click "Fonts" and pick a font of your choice. Will you look at that? "some text" is all different than the other text!
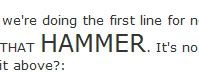
Notice how we're doing the first line for now? Well, keep your pants on! HEY! DROP THAT
HAMMER. It's not that kind of Impact. Next is size, so yes see it above?:
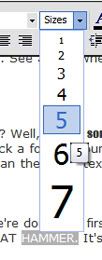
Just like before, remember to highlight what you want to change first, then click. Then you'll get the size all nice and
changed:
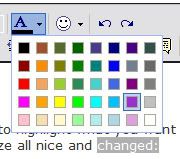
Also, keep in mind that you can combine them. Just remember the text normally stays selected, but be sure to make certain that it is before clicking any new formatting options. Which brings us to our next option text color! Can you guess where it is? Why of course! Right beside the size option!:
and the aftermath

Flink will stop with the examples for everything since most of them are really easy to see and it's getting kind of annoying saying all of these pictures. So for now, just a, "This is how it's done." If you seriously MUST have product images, just PM Flink she'll consider it. XD
Back to the tutorial. Smilies, smiles, whatever you call them. Even emoticons there's more than one way to put them on Menewsha:
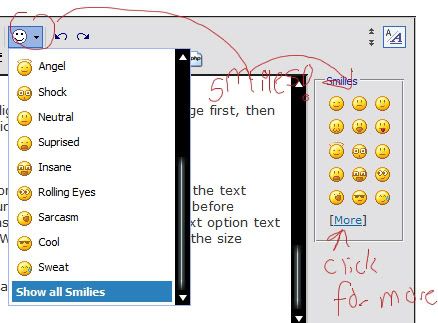
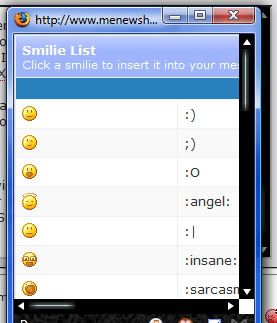
See, there's the main one, above following the order that the rest of Flink's tutorial has taken and there's the other list over to the right. Notice the "[More]" thing below them? Click that! See what you get?
Note for emoticons/Smilies: Clicking on the IMAGE in all cases will put the emoticon into your post in the place where your typing cursor currently is. You CAN copy/paste them, or even delete them.
Last in this line of icons on the WYSIWYG is the Undo/Redo buttons.

Note that the one on the LEFT goes backwards, obviously it's pointing backwards, to the left. And the one to the right goes FORWARDS. This means that the left undoes something and if you change your mind, the right one can redo it. Flink tries not to use these buttons too much since they generally remove/add way more than she wants them to.